As each day is progressing with AS-3, my life has become really interesting nowadays. Today we will be seeing the next step's we will be taking in learning more about AS-3 migration. To do that we will start with a small hello world application. By this way we will learn almost all of the basic aspects of Flash/AS 3.0 and by the way to do this exercise you need to have Flash CS3 installed in your machine.
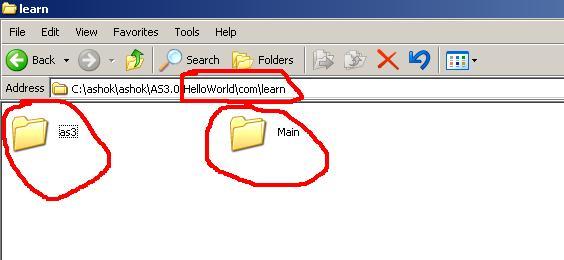
Before starting with the new HelloWorld application, we have a small home work to be done initially. Create a new folder in a location and with name of your convenience and inside the folder you created just now, create a new folder named "Hello World". Once that is done then navigate inside the created folder and create a subfolder named "com". Inside "com" create another subfolder named "learn". Don't get angry with me but for the one final time create two folders named "as3" and "Main" as subfolder's inside the last created folder "learn".
Now if look at your current screen it should look like the one below(except for the three red circles which was made by me using mspaint to show the path and the two subfolders created for reference).
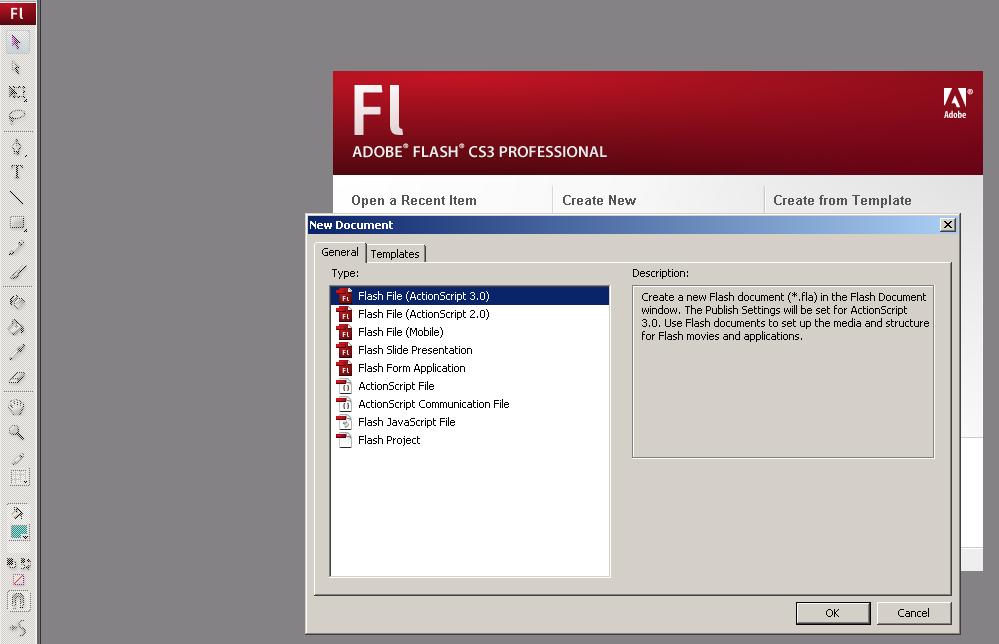
Thats it for now and run the Flash IDE, after it has initialized completely do select "File" -> "New". From the options select "Flash File(ActionScript 3.0)" and click "OK". The screenshot is attached below for your reference.
After creating the Actionscript 3.0 type File click on the stage and create two objects as follows
1) Dynamic TextField - instance name "$dyn".
2) Simple Button - instance name "$btn" .
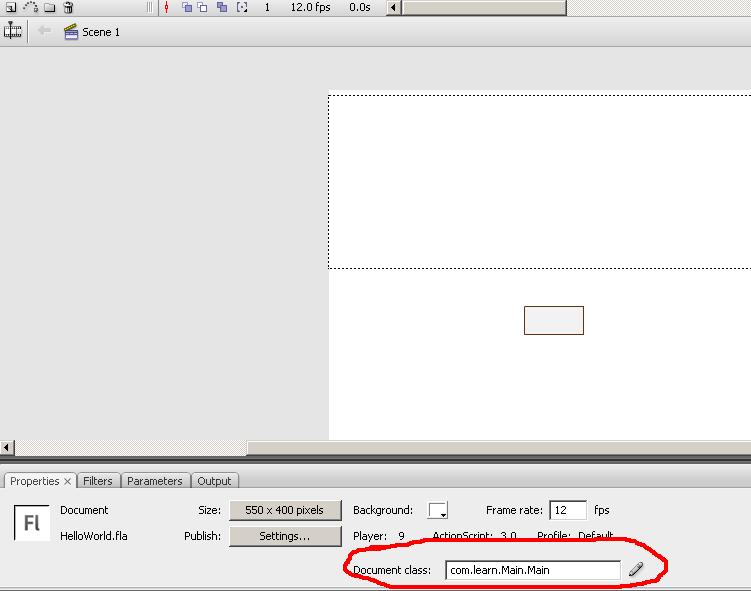
Now click an stage area and open the properties panel(shortcut ctrl+f3). Now the property panel is open type com.learn.Main.Main in the Document Class field. See screenshot below.
Do not try to compile for we have to add the class files now. Still you wish to know what could have changed in the error messages go ahead and try it.
After all the above steps are completed hit Ctrl+N or create a new ActionScript File from the New Document window just like the way you created a new flash file sometime before but select ActionScript File (which would be probably the sixth item). Upon successfully opening an empty ActionScript file copy and paste the code below. see screenshots first.

package com.learn.Main
{
import flash.display.MovieClip;
import flash.text.TextField;
import flash.events.MouseEvent;
import flash.display.SimpleButton;
import com.learn.as3.HelloWorld;
public class Main extends MovieClip
{
private var hWorld:HelloWorld;
public function Main()
{
init();
}
private function init():void
{
trace('I N I T');
hWorld = new HelloWorld();
$dyn.text = hWorld.sayHello();
$btn.addEventListener(MouseEvent.CLICK,releaseAction);
}
private function releaseAction(e:MouseEvent):void
{
trace('onRelease : '+e.target.name);
}}
}
Finished pasting the above code ???? Now save it in the name "Main" under the folder com->learn->Main->Main.as. What we have done now is an ActionScript class has been associated with the FlashDocument itself. have you ever remembered this being possible in the previous versions ? what we have been doing earlier was that we wrote an class file and associated the main timeline as an parameter to AS2.0 class file. But now the Flash File itself can be associated with an Custom Class File. isn't this great ?
We are almost 70% done for the tutorial to be completed. The one final thing you have to do is create another ActionScript Class just like the way you created Main.as and paste the below code in that. Save the file under the folder com->learn->as3 with the name HelloWorld.as.
package com.learn.as3
{
public class HelloWorld
{
public function HelloWorld()
{
}
public function sayHello():String
{
return "Hello World";
}
}
}
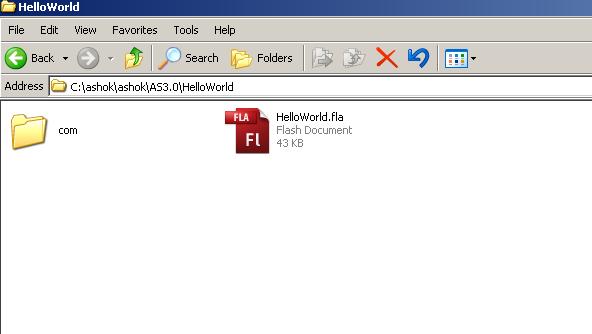
Done pasting the second code? Now get back to the fla file and save it under the folder Hello World with the file named as "HelloWorld.fla". Now there should be a flash source file "HelloWorld.fla"(you will see file name extension ".fla" only if you have enabled show extensions setting in windows) and a folder (which we created initially) named "com" inside the folder HelloWorld. To avoid confusion and for having a clarity see screenshot below.
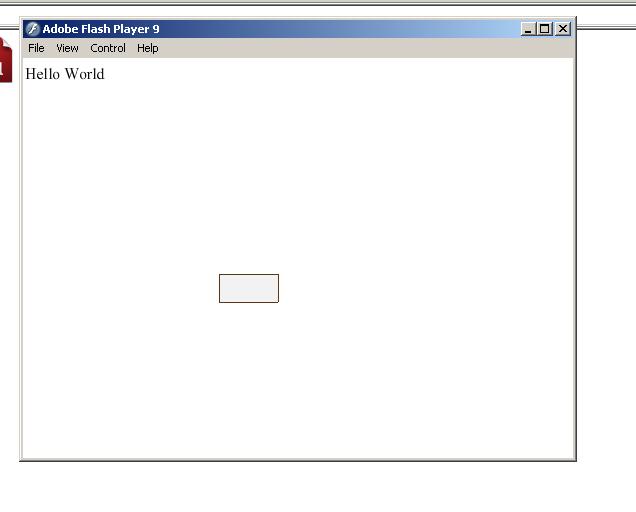
Now that everything is in place and the only step remaining is to compile the flash file we have created. Doing this will generate the swf file named "HelloWorld.swf " without any errors if you had copied and pasted the code and saved them with the appropriate names and at correct location specified above. The output of the swf is attached as a screenshot below.
But still if you wish to know what happens when the button is clicked you need to either run it from the Flash IDE or have some good logger tools like afterthought or Flash Tracer plugin for firefox.
Thats it for now and we will in less time see what the chunk of code written for this tutorial does.
Regards,
Ashok Srinivasan.